(Dude! How'd you get a "Read More" link? Use the Insert Break in the section on Inserting Cool Stuff.)
The Big Picture: Your Blogger Interface
Look familiar? This is what your blog creation looks like - a bunch of white boxes with iddy-biddy tools. Not to worry - these tools are relatively simple to use. You'll find them in the horizontal gray line just under the title box. Over the the right side, it has two tags labeled "Edit HTML" and "Compose."
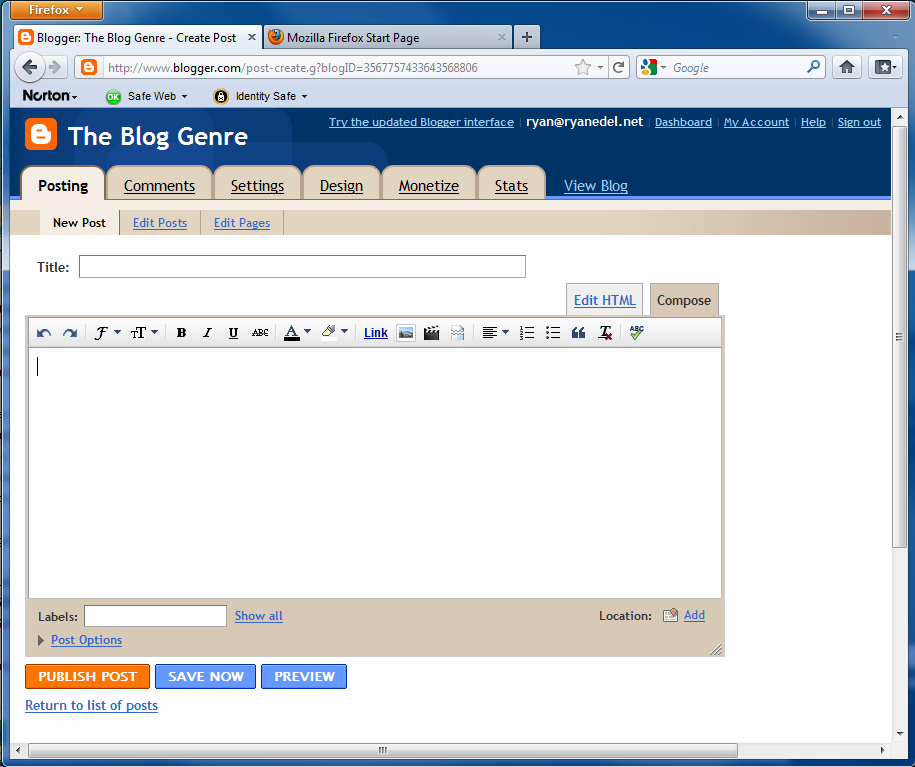
Take a quick look at your toolbar. When you're in Compose should look like this:
| Yay! So many awesome tools! |
| WTF? Where'd my awesome tools all go? |
| Whew! That was a close one! |
Formatting Text
Let's start from the left. There are the tools you'll use to edit text:
| I can change the font! Schweet! |
- Undo
- Redo
- Font
- Text Size
- Bold
- Italic
- Underline
- Strikethrough
- Text Color
- Highlight Color
Inserting Cool Stuff
Yes, you'll be formatting text a fair amount - mostly putting things in bold and italic. But that's kinda lame. We want to draw our attention to the cool buttons in the middle of our toolbar: The Insert Buttons
 |
| Seriously, could you make them any bigger? |
This is quite possibly the most important button on your toolbar. With it, you can link your text to a URL. To do so, just highlight your text:

click Link, and BAM! (you'll get a box like the one below)
 |
| Woah...that's a big blue box covering my screen...and my highlighted "Click to visit my Rockin' Writing Website" is down in the corner on the right...and it's also listed as "Text to Display" inside my big blue box... |
 |
| Sigh...I really do love large blue boxes with text fields...but not quite as much as I love shameless advertising for my rockin' website, aka 12Writing.com. |
Okay, I cheated. My Introduction to Fiction and Poetry blog - which is a subdomain of 12Writing.com - will work if you type in http://www.ifp.12writing.com. But the actual website is at http://ifp.12writing.com. I programmed a redirect into my DNS settings. And don't worry if you don't know what DNS settings are - most people don't. Which is why you have to be careful when you link to other websites - many websites today are not maintained by professional web developers, and they won't forgive you for linking to http://www.subdomain.website.com when you really needed http://subdomain.website.com. Otherwise, you shouldn't need to worry about DNS Settings - you don't need them to use Blogger. Unless you want a Custom Domain. But that's a question for another blog post. (WAIT! How did you offset this big block of text?? Use the Quotes function down in Formatting Paragraphs)
(yes, the shameless advertising continues. You'll discover that the internet - mostly because of Google and other search engines - uses links as a form of currency. By linking to another website, you're telling Google that it's a good website to visit. And Google will reward that website by sending more traffic to them. But be careful - if you link to a bad website (the kind of website that will give your laptop a virus while drowning kittens a pool of expired milk), then Google may also consider your website to be a bad place to hang out. So they'll stop sending people to your website. And that, I'm afraid, is bad. But this is part of why the Link button is so important. As you use the internet more, you'll find that the words you use and the links you post have an effect on how visitors and Google will perceive your site. So Link with care!)
Inserting Other Cool Stuff
|
| What could be cooler than inserting a link? |
The lovely box with the landscape imagery will allow you to insert a picture. The black "and ACTION!" button beside it will allow you to insert videos - especially cool, because you can insert YouTube videos. Just enter the title of the YouTube video you'd like to share, make sure that's the one that comes up in the search results, and BAM!
Insert Break
Okay, it's not as cool as Insert Link. But it is pretty awesome. It allows you to type a short introduction to each post, and then a "Read More" link will appear on your homepage. This way, it's easy for visitors to see many blog posts at the same time, and then pick the ones that interest them most. (Trust me - this is way better than scrolling through eight pages of blog in order to find the one post you were looking for...)
 |
| See the horizontal gray line in the middle there? That's what an Insert Break looks like in Compose mode. Note how I have a short introduction to my blog post just above it, and then the bulk of my blog post follows below. Assuming, of course, you've found this interesting enough to still even be reading the bulk of all this...) |
Formatting Paragraphs
Like formatting text, the formatting paragraph tools are pretty self-explanatory:

Of these, the Align Text and Quotes tools are the most useful - I use these in most blog posts. Right now, I've offset this text with the Quotes tool because it's more of an aside - if you wanted to, you could skip reading this without missing any of the important stuff. And you're time is important - I don't want to waste it by making you read every word in my blog post. I mean, I'm hoping you'll want to (because I'm just that cool), but there's a good chance you're skimming. You're probably just looking for the information you came for, and then you'll go back to checking Facebook. That is, after all, what most visitors will do when reading your blog. So you should visually direct them to the most important points in your blog post, and then use the Quotes tool to tell them what to skip.
That's about it for this tutorial. You'll next want to return to the Contents so you can see which posts to visit next. Or you could simply hit the Back button on your browser.
Before you go, note that I've included the tag "Toolbar" to make this post easier to find at a later time.
No comments:
Post a Comment